Weight Check
I still have a bit of weight to remove, add, and move around. I thought I'd go ahead and check weight to see where I'm at. Not bad 1959 on a half tank against the 1924 target. Can't say I'm surprised. ABS adds weight. I'm adding a larger battery and moving it to the passenger floor which should help the weight distribution, but increase weight. I still have the rear inner bumper on which will drop maybe 20 pounds total. Still need to cut fenders, but flares are heavy. Tires are street steel radials on heavier rims. The Avon cross-plys will be lighter. We'll see where it lands.
Camber Woes
With the car back on it's suspension, I started to align it. With the cross-ply slicks I'm shooting for fairly low camber. The front aligned nicely, but I was really unhappy with the steering rack angle. I don't want the lowering to induce a bunch of bump steer. I went ahead and installed a set of rack spacers. The FM hub stands are sweet.
The rear was being a real pain. The left rear was fine and I was able to set toe. I was able to get left rear camber to near zero. The right rear is screwed. The lowest camber I can get is -3ish! Also my ride heights are identical, but my right shock is jacked significantly higher. The obvious culprit would be a bent upper arm. I spent hours looking it over before I finally determined that my upright top arm was actually bent. I have to assume this occurred on the press when I was heating it to free the stuck axle. I've got one coming from eBay.....well crap. Moving on to the next project.
Battery Relocate
I relocated the battery to the passenger floor. I upsized to a much larger AGM battery to allow for a constant loss tune in the future. The job was pretty easy. I made a whole new ground using AWG 4 welding cable. The positive side, I just cut back to length.I fabricated my own hold down using riv-nut mounts, all-thread, ans angle iron. I'm very happy with the outcome.

Phat Tires!
My 21.5" Avon cross-ply slicks arrived. Mounted and on the car with 10mm spacers front and rear. They look awesome on the car. You can really see my screwed camber here.

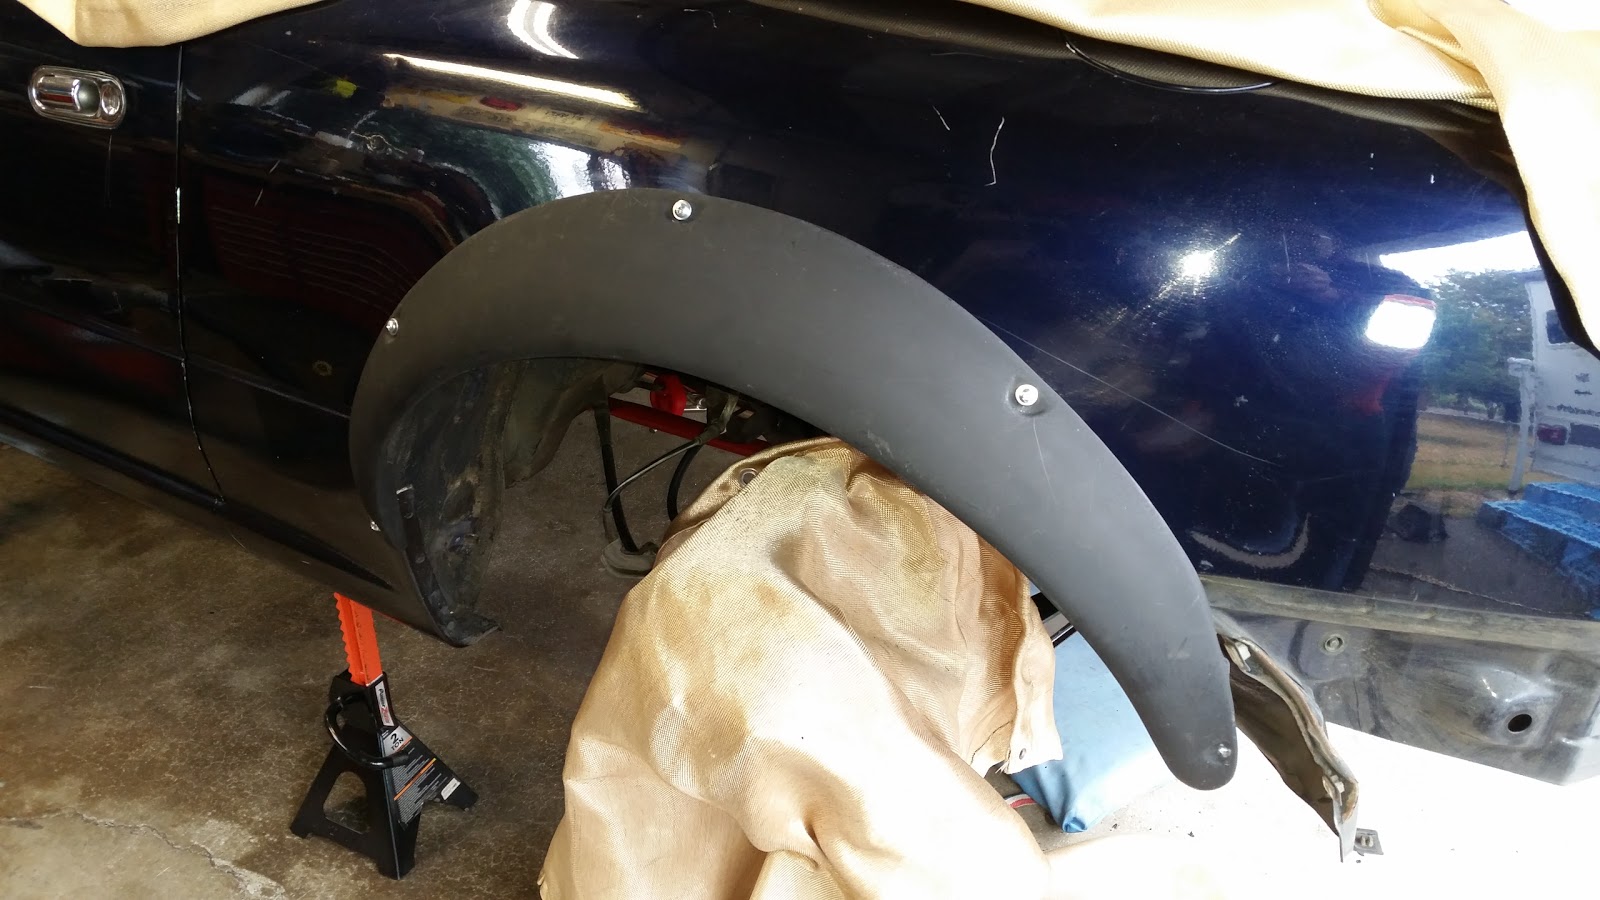
Rear Flares
I dragged the car out of the garage and washed it up. Looking good.
Taped and ready for flare work.

I did a complete write up with instructions and pics on the rear flare install here: Flare Install
A couple of photos.
 |
| Cut and cleaned |
 |
| Welded |
 |
| Sealed, JB Weld |
 |
| Rough fit |
I'll let the sealer dry while I'm at work this week and paint up the bare metal Sunday.
Camber Woes Solved
I received my eBay uprights and promptly pulled the existing right rear upright. My eye was correct. The existing upright is bent dramatically. I put another new bearing in the "new" eBay upright, and transferred over my hub, zerk, and poly bushing. I'm 100% confident the problem is solved, but I have to wait on my new adjustable upper arms with Delrin bushings to arrive before I can put it all back together.Rear Bumper Lightening
The rules allow for removal of inner bumper structures, so I figured I'd get rid of the extra pounds outside the axles. I followed the method Kieth Tanner used in his Targa Miata build page to retain the skin. I'm still wondering if I'm going to see some parachute effect from the hollow rear, but I doubt it will be an issue at autocross and hill climb speeds. I secured the lower bumper lip with zip-ties to take the floppiness out of it. It worked pretty well. Estimated weight loss 15-20lbs |
| Before |
 |
| After |
More Rear Suspension Woes
My AWR Racing rear adjustable upper control arms arrived, but one of the bushing housings had a pretty serious bend in it making it out of round. Tony at AWR responded super fast to the issue and they're fabricating a new one, but it'll take a week and a half. With the car so close to being done, it seems like an eternity. A few months ago it would have been no big deal, but I don't have much to work on at this point. The overall quality of the control arms looks A+ and I'd definitely buy these again even though I had the issue on the one.
Front Fender Cutting
I moved on to the front fenders while I wait for the rear suspension parts. It's pretty clear at this point that the car won't actually see an autocross course until next spring. I made a nice smooth arc cut that I thought would be adequate for clearance. Next I measured bump travel at full droop. I then installed the wheel and actually measured the clearance with the wheel at worst case position, turned inward and outward. Here's the cut line remarked for full clearance +1/2". As you can see, my guesstimate was off by quite a bit.
Here we are with the wheel back on for a re-measure after cutting. All clear now. I have just a bit of rub on the air dam near full lock at full droop. Honestly, when am I going to be at full lock and full droop at the same time, not an issue. I'll paint the raw edges with some black Rustoleum and a foam brush.

The second cut removed the existing upper bumper support. The lower support was missing when I bought the car. I fabricated new ones with aluminum stock I had left over from other work.

Front Reinforcement
The front bumper is pretty flimsy. I need some reinforcement to allow the front air dam to actually do some work. I threaded some aluminum rod and added a piece of aluminum angle for strength. I'll re-evaluate additional stiffening later.
Finally I'll seal off the air openings in the air dam so it can make a bit more front down force. ABS plastic and rivets or black Gorilla Tape. Either way nothing permanent. I'll want to reopen them for hill climb or track use.

Trailer Parking
My "gravel feature" where I park my hauler and pickup was put down in three separate phases over the last couple of years. To say it was off level would be kind. I rented a skidsteer for a couple of hours and leveled that baby out. Now my hauler isn't sitting all "tippy".
One More Packwood Weekend
It's hard to believe the 2016 season is almost over. We ran at Packwood this week. Next week are our final two events at Portland International Raceway. As usual, both Packwood courses were awesome. Here's my best Sunday run.Reflections
It's time for more reflection on the build. The build is nearly complete. I'm basically waiting on a couple of suspension parts. I'm pretty proud I did the whole thing on my own. So far, the only help I've had is feedback from other DP competitors, community members, and of course the professional cage build. I'll do the corner weighting and ride height myself. I'll also set the alignment then send it out to my trusted local race shop for a pro alignment. We'll see how close I get it in the garage. I also need a dyno tune.So what did I learn since my last reflections post?
Tires - buying the used Hoosier A6s was a huge mistake. I didn't know anything about race tires and apparently I didn't know much about tires in general. The difference between DOT Hoosiers and bias ply slicks is huge. The A6s I bought were made in 2008. That's ancient for any tire, let alone a race tire. When I had them unmounted, the beads actually tore. They looked good, but looks can be deceiving. The setup requirements are also quite different. Why waste effort setting up an inferior tire. Get a quality race slick and be done with it.
Little Stuff Weighs - I took a crap load of weight off the car, but I'm still probably going to miss minimum weight. Why? because I didn't watch weight closely on my add ons. Bolts, nuts, washers. They add up. I feel like I have a stronger car for the effort, but still weight is king. I'm guessing I'll be 50lb or more over minimum with no ballast added, we'll see. At least most of the weight moved way down and inboard.
ABS is a pain - I think It'll be worth it, but good grief. It's heavy, the sensors are delicate and expensive, bleeding the brakes is a nightmare (my pedal is still like a sponge), and the one electrical problem I have left is my ABS warning light doesn't work.
Be prepared for delays - The whole project rolled along smoothly until the last corner on my suspension then Boom! Major problems. I was pretty frustrated for a while. I've been dealing with the right rear for almost two months.
No comments:
Post a Comment